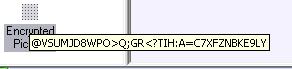
Picture Encryption
Tool
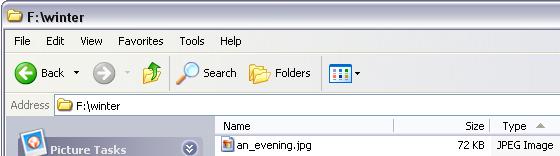
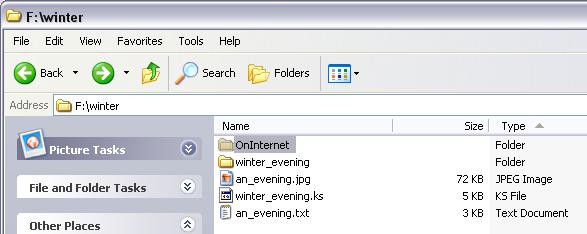
Create a directory in your file system and place the picture file, that you want
to encrypt, in this directory. For example, there is a picture named
pic0001378.jpg that you want to encrypt.
Step 1. Create a directory F:\winter, for example.
Step 2. Copy pic0001378.jpg in to F:\winter
Step 3. Rename pic0001378.jpg to a user friendly name like
an_evening.jpg
Step 4. Use main menu item Tools, sub-item
Picture Encryption. Load an_evening.jpg in to PE Tool
using Open button.
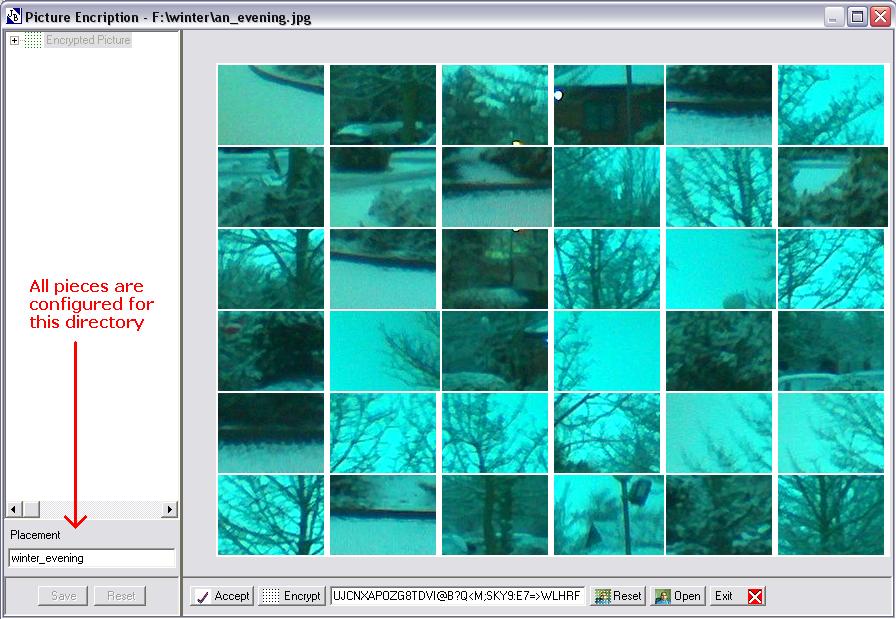
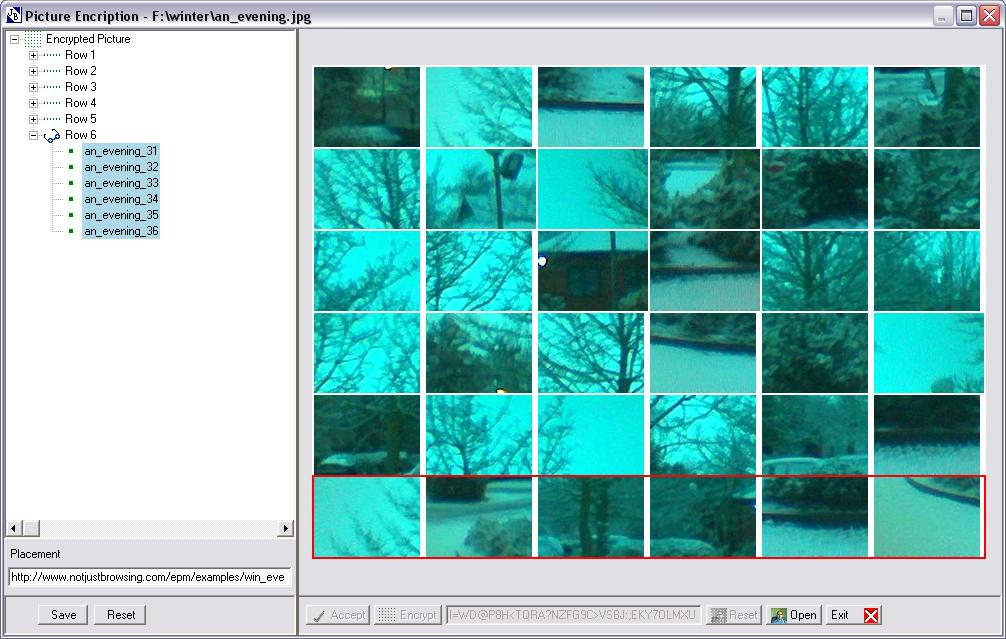
Where to place picture
pieces
Step 8. At the time of acceptance of encryption, all the
pieces are configured to be placed in one sub-directory as mentioned in the
Placement name. If the address is of internet then sub-directory name will be
OnInternet.
Step 9. Placement of all pieces or a row of six pieces
or any of the thirty six pieces can be achieved by selecting appropriate
piece or pieces and changing the text written under the heading Placement. Don't
forget to press "Enter" button to confirm the change.
Step 11. To verify that the picture pieces can
be re-arranged, a user needs to place directories (with picture
pieces) within their "
Import Base
Directory" OR "
Import Base
Directory" made to point towards the parent directory. In above example
"Import Base Directory" may be F:\winter . Any files placed in
OnInternet directory by PE Tool, must be placed at the internet
address/es specified at the time of encrypted picture pieces being saved.
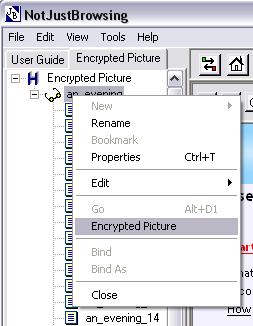
Step 12. Using context menu in the
Shelf, import .ks file created by PE
Tool. An Item will appear in the Shelf named "Encrypted Picture". Open this item
in Study Place, select the image and use "Encrypted Picture" from context menu
to initiate the process viewing encrypted picture.
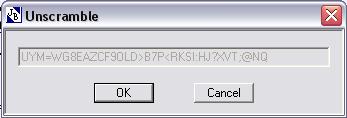
A dialog box named "Unscramble" will appear asking for keyword, copy and
paste keyword from text file created for this image by EP Tool. Press
OK and picture should be seen complete, NJB
will collect the pieces from specified locations and arrange them
according to the keyword specified in "Unscramble" dialog box.
To show encrypted picture to someone, a user needs to give them
.ks file, local directory (if any) with any
images included in it and above all the keyword to unscramble.
Make sure to place picture pieces on the internet addresses from
OnInternet directory if there is one.
What else ?
1. Keyword can be reused to scramble any other picture.
2. The pieces of picture on internet addresses can be
replaced with the pieces of another picture of the same size and of the same
name. If replaced picture is scrambled using original pictures unscramble
keyword then this replacement picture can be unscrambled using the same
keyword.
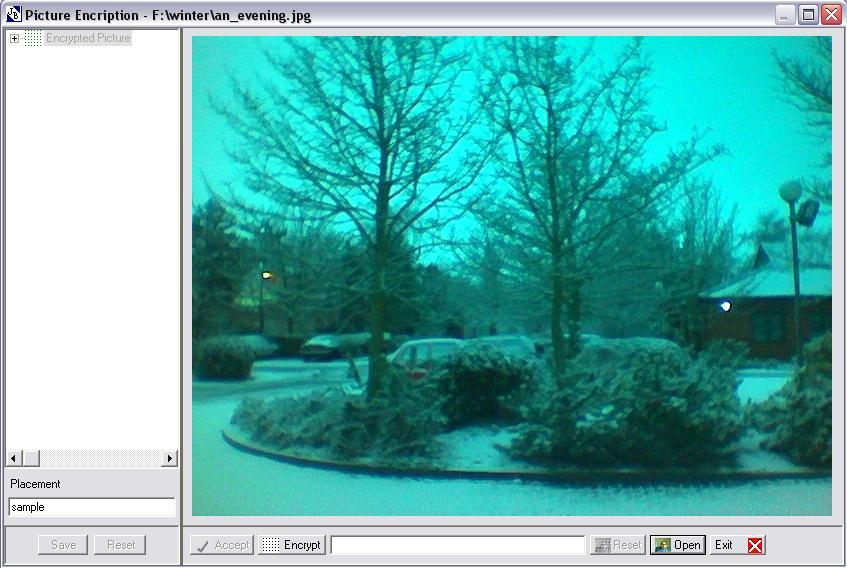
Step 5. Encrypt an_evening.jpg by pressing
Encrypt button one or more time as desired.
Step 6. After achieving satisfactory encryption, change
given name of sub-directory to the one that you like, it is under the heading of
Placement. It can be an internet address, in this case address must start like
http://www.notjustbrowsing.com/epm/examples/winter_evening
Step 7. Press Accept button to accept the
encryption.
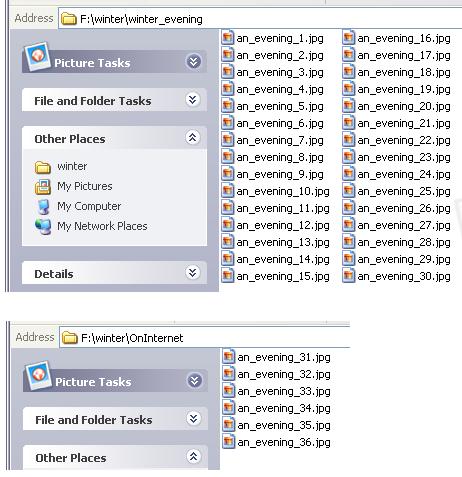
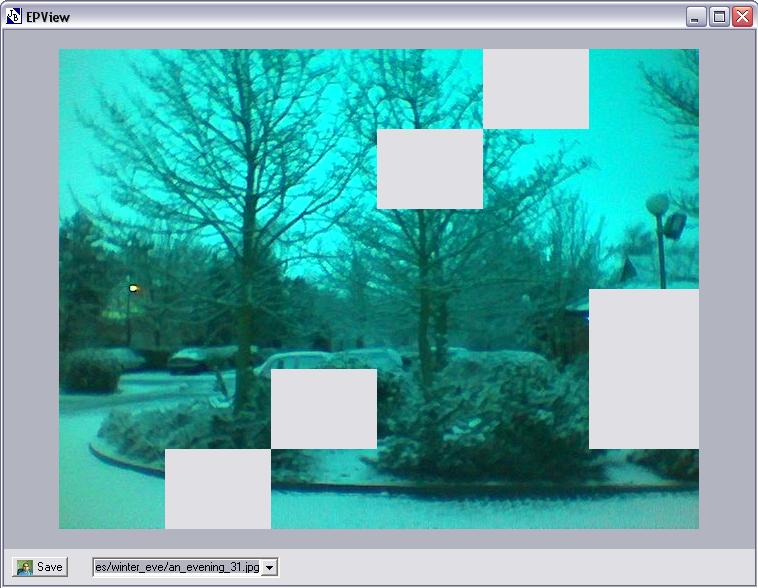
Step 10. Once satisfied with the placement of picture
pieces, press Save button. All thiry six pieces will be placed
in either named directories for each piece or if they are to be placed on the
internet then OnInternet directory.
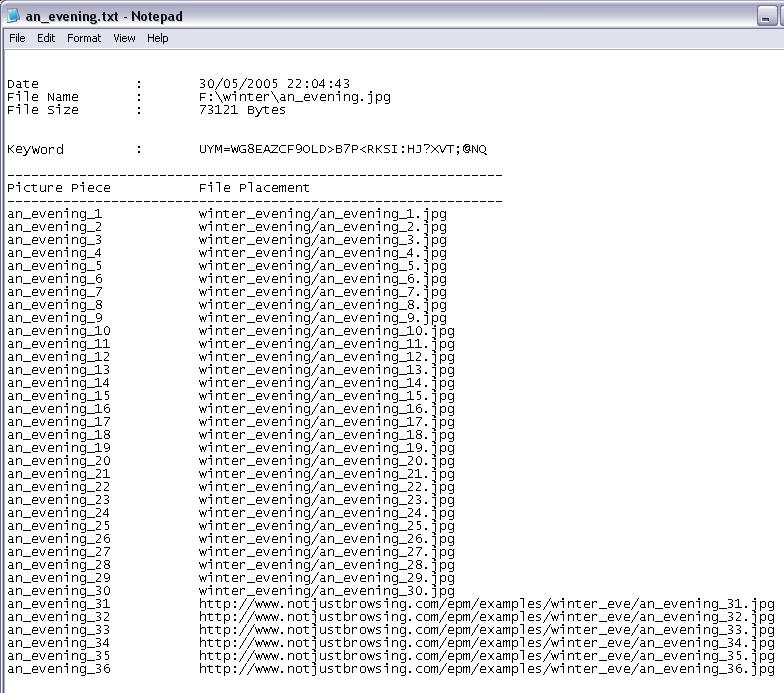
There will be a text file (named after the picture file) with detailed
information, a .ks file (named at the time of Save) and specified directories
with thirty six pieces of picture.
In above picture there are six pieces of picture missing. Next to
Save button, there is a list of those addresses which failed to
be accessed for any reason. In above case, these six pieces are ment to be on
the internet but they are not.
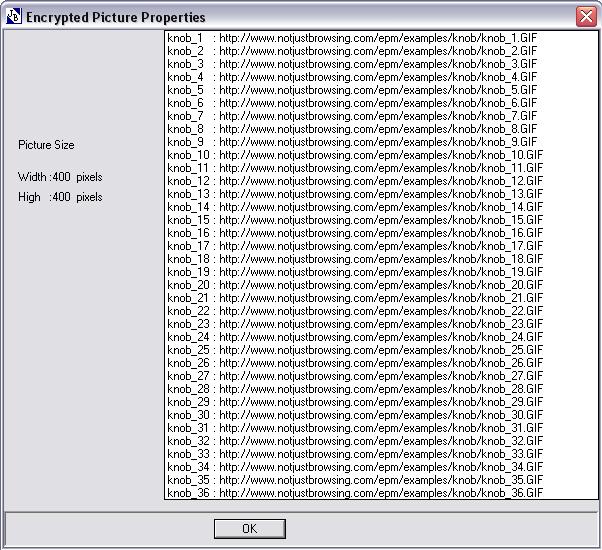
Keyword of an encrypted picture is
placed in the properties of this encrypted picture
collection.
Properties of an encrypted picture can be viewed from
the Study place.